2010年10月30日星期六

How to play DVD on Mac

This tutorial includes 4 parts:
Part 1, DVD Regions
Part 2, How to play DVD on Mac?
Part 3, How to Unlock DVD Regions on Mac?
Part 4, how to copy protected DVD Movie on Mac OS X

Part 1, DVD Regions
Region 1: North America; U.S. territories; Bermuda
Region 2: Europe; Western Asia; Kingdom of the Netherlands; Egypt, Japan, Lesotho, South Africa, Swaziland; British overseas territories, French overseas territories; Greenland
Region 3: East and Southeast Asia
Region 4: Oceania; Central and South America; Caribbean; Mexico
Region 5: Africa, Central and South Asia, Belarus, India, Mongolia, North Korea, Russia, Ukraine
Region 6: Mainland China

Part 2, How to play DVD on Mac?
VLC is part of a remarkably sophisticated suite of VideoLan applications available for a wide range of operating systems, ranging from Linux to Windows and, of course, Mac OS X.

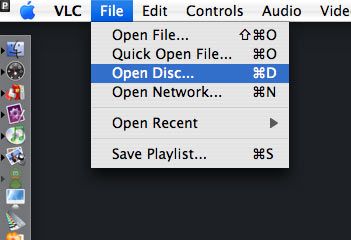
Download and install VLC and open it, then select File > Open Disc. Click on the Disc tab, click on DVD, select the device, and click OK

Or select File > Open File..., select your VIDEO_TS folder, and voila! You're watching your movie.

Play DVD on Mac

Part 3, How to Unlock DVD Regions on Mac?
Most commercial DVDs use encryption that keeps them locked to one or more “region codes,” meaning the discs you pick up in other continents usually won't play on an American DVD player. If you believe the movie studios, this encryption is a necessary tool in the ongoing war against piracy. Basically, it helps them release the same movie in different parts of the world—at different times and for different prices. However, because pirates rarely resell legitimate copies of movies (they are pirates, after all), this system's primary effect is to prevent movie collectors and frequent travelers from enjoying legally purchased films once they get home.

There are some multi-region DVD players out there. They are perfectly legal, but they tend to be pricey and rare. And if you are the jet-setting type who is likely to pick up foreign flicks in the first place, you probably want to watch them on the go using your laptop. That's why the most frustrating part of region codes is the way they affect laptop DVD players.

Although laptop DVD drives are technologically capable of playing any DVD, they typically force you to switch among region settings to play imported discs. Try switching this setting more than a fixed number of times (typically five over the entire life span of the computer), and the setting will be locked forever.

For example, if you switch from Region 1 (the United States and Canada) to Region 3 (parts of Asia) to watch a kung-fu flick you picked up on a trip to Hong Kong, you'll have to switch back to Region 1 before playing any movies you purchased at your local Best Buy. Watching that one Jet Li movie just burned up two of your five switches—and not even reinstalling your operating system will get you more. Fortunately, some clever programmers have created software solutions that circumvent disc regions entirely, turning your notebook into a portable multiregional DVD player.

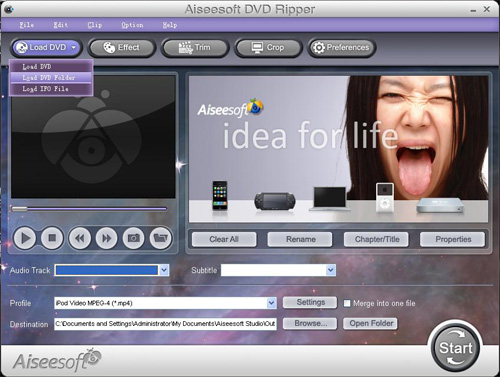
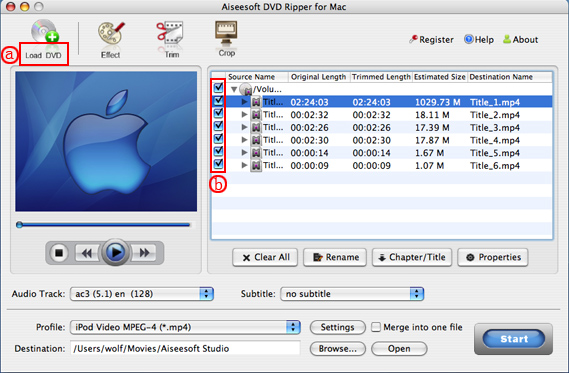
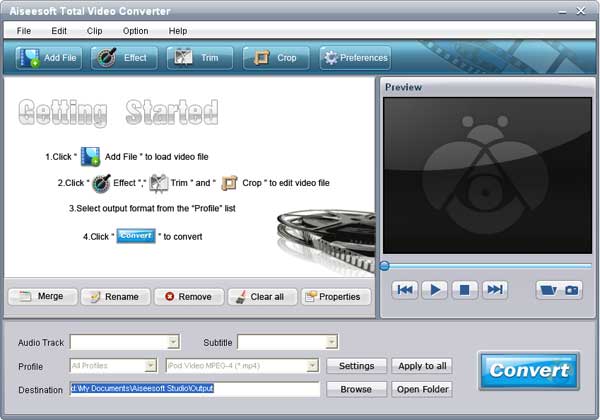
There are plenty of programs for Macs that allow you to rip DVD movies on Mac. I recommend Aiseesoft DVD Ripper for Mac which allows you to rip DVD movies on Mac easily.

DVD Ripper for Mac

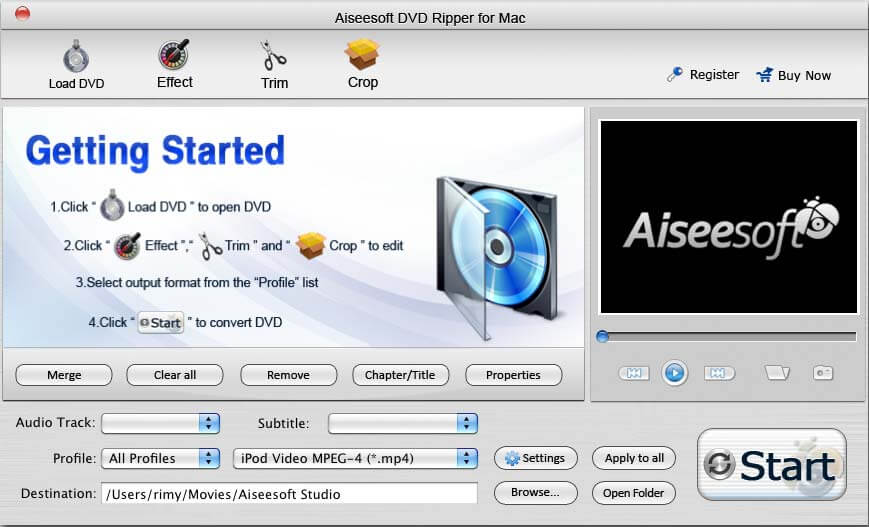
This Mac DVD Ripper is fast in ripping DVD to all popular video and audio formats as it includes the features of DVD Ripper and DVD Audio Ripper.

It can rip DVD video to video formats including MP4, AVI, MOV, M4V, 3GP, MPG, MPEG, FLV, etc. and it can convert DVD audio to MP3, M4A, AAC, AC3, etc. It's the best solution to rip a DVD to video or audio formats on Mac. This solution has its advantages (chief among them is that watching movies off your hard drive uses far less battery life than reading them from an optical disc.)

If you do not want to spend money, I recommend downloading VLC, an open-source media player that sometimes circumvents region encoding. The DVD drives on different computers (including various Macs) come from diverse manufacturers, and VLC plays out-of-region discs on some, but not all of them. Unfortunately, there's no way to know if it will work on your system until you try. Fortunately, the program is free.

Part 4, how to copy protected DVD Movie on Mac OS X
Copy protected DVD action can turn into failure if you don't have appropriate software. Very often DVDs are protected against ripping and thus copying the contents of the disc to your hard disk doesn't work. Even if you do succeed in ripping the contents of the disc, to copy protected DVD also means to compress the files on your recordable DVD since the latter can only hold 4.4GB of data while the original DVD is more than 7GB in size. So the powerful and professional DVD copying software is necessary. And Aiseesoft DVD Copy for Mac is the proper software you need.

Step 1: Download and install DVD Copy for Mac.

DVD Copy for Mac

Step 2: Load DVD - load the DVD folder or DVD image ISO.

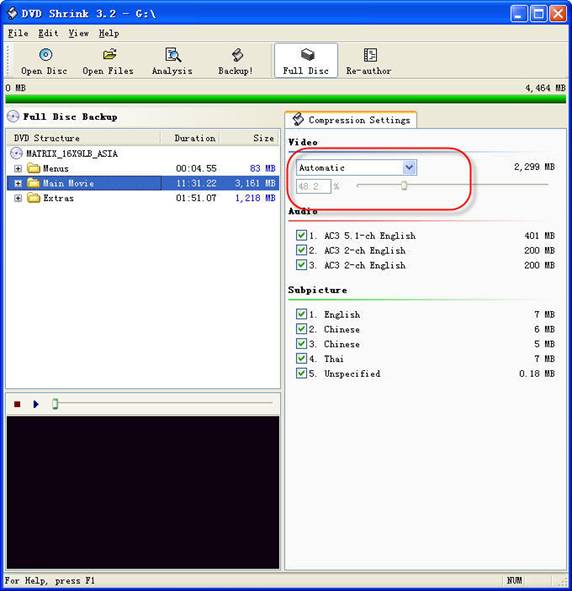
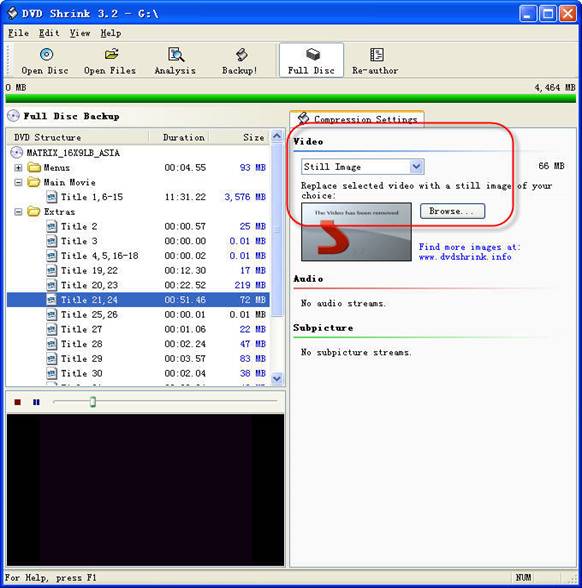
Step 3: Adjust output settings

You can choose "Full Disc" or “Main Movie” to copy the full disc or the main movie according to your need.

Also this DVD Copy allows you to choose the DVD audio track, subtitle and name the output volume’s name.

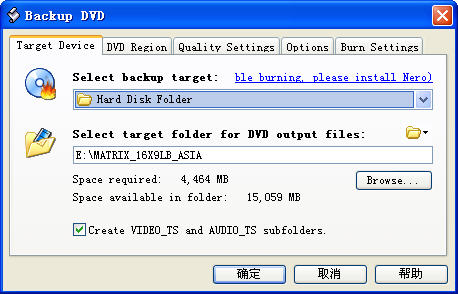
Step 4: Choose output target

Aiseesoft DVD Copy for Mac enables you to copy your DVD to another DVD disc, DVD folder or DVD image ISO.

2010年10月28日星期四

iPod Compatible Video

This article is divided into four parts separately introduce what is iPod Compatible Video, which video format is better for Apple iPod Video, is my video iPod compatible and how to make the video compatible with your iPod.

Part One: What is iPod Compatible Video?
Part Two: Which video format is better for Apple iPod video?
Part Three: Is My Video iPod Compatible?
Part Four: How to make the video compatible with your iPod?

Part One: What is iPod Compatible Video?
Firstly, I will introduce you what is iPod Compatible Video, iPod Nano Compatible Video such as iPod Video MP4, iPod Video H 264, the specifications page lists the following:
Apple iPod video specifications from their official website:
H.264 video, up to 1.5 Mbps, 640 by 480 pixels, 30 frames per second, Low-Complexity version of the H.264 Baseline Profile with AAC-LC audio up to 160 Kbps, 48kHz, stereo audio in .m4v, .mp4, and .mov file formats; H.264 video, up to 2.5 Mbps, 640 by 480 pixels, 30 frames per second, Baseline Profile up to Level 3.0 with AAC-LC audio up to 160 Kbps, 48kHz, stereo audio in .m4v, .mp4, and .mov file formats;
MPEG-4 video, up to 2.5 Mbps, 640 by 480 pixels, 30 frames per second, Simple Profile with AAC-LC audio up to 160 Kbps, 48kHz, stereo audio in .m4v, .mp4, and .mov file formats.

That’s a little confusing, but there’s only a few numbers you’ll need to remember for each format.

iPod H.264 Video format
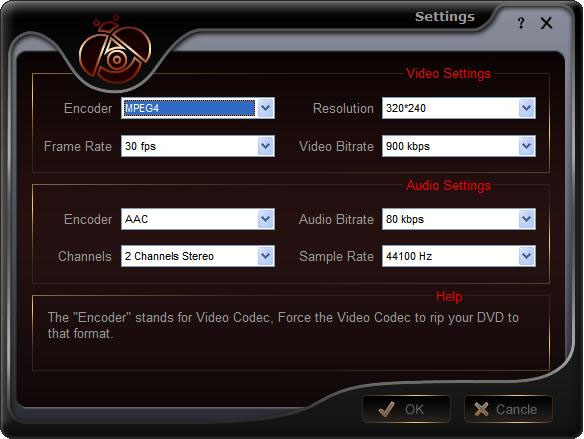
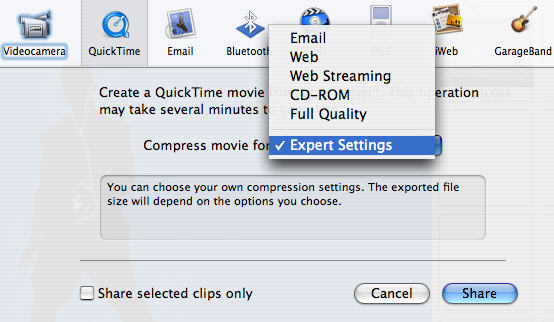
The highest video bitrate with the H.264 codec is 768 kilobits per second. The biggest picture size for your H.264 movie is 320 pixels wide by 240 pixels high, the exact dimensions of your iPod’s screen. Your iPod can play H.264 video at framerates up to 30 frames per second. Every one of the applications that we’ll be using encodes with the Baseline Profile. Your audio needs to be encoded as AAC audio up to 160 Kbps, 48 kHz, and it can be in either stereo or mono. As long as you follow all the guidelines, your movie can be a QuickTime movie or an MPEG-4 movie file.

iPod MPEG-4 Video formatYour other option, MPEG-4 video, supports a much higher bitrate than H.264 video - 2,500 kilobits per second. Using higher bitrates will also create larger files. The result: you’ll have less space for additional songs and movies. The biggest picture size for your MPEG-4 video is 480 pixels wide by 480 pixels high - three times as many pixels as your iPod’s screen is capable of displaying. Your iPod will shrink the picture proportionally so that everything fits on the screen. Again, the iPod can play videos up to 30 frames per second and our audio and file format options are the same as H.264 video.

Part Two: Which video format is better for Apple iPod video?
That’s a tough question. H.264 is arguably better because it offers high quality and a much smaller file size when compared to MPEG-4. However, both formats look quite good when you encode your video at the higher supported video settings. One thing that most people will agree on is that H.264 video takes longer to encode than standard MPEG-4. This means that converting a two hour movie to iPod video can take considerably longer using the H.264 codec (especially with QuickTime Pro’s pokey Export: Movie to iPod video option). Still, I prefer the H.264 codec in most instances.

Part Three: Is My Video iPod Compatible?
Some of the video files that you download from the web or from file sharing networks like BitTorrent may be iPod compatible - even if they’re not marked as such.

The easiest way to determine whether a video can be played on your iPod is to open the file in QuickTime and select Window: Show Movie Info. In most cases your video should be iPod-ready if the format is H.264 or MPEG-4, the audio is AAC, and the size of your video is 320 x 240 (or smaller) for H.264 or 480 x 480 (or smaller) for MPEG-4. Also, look at the data rate and make sure it’s not over 900 kbits/sec for H.264 or 2600 kbits/sec for MPEG-4.

QuickTime info for iPod Video

Part Four: How to make the video compatible with your iPod?
If you have QuickTime Pro ($30 and worth every penny) or the latest version of iTunes (free!), this is, by far, the easiest conversion that we’ll talk about.

In iTunes, after you’ve added your video to the library, right click it. Select Convert Selection for iPod. iTunes will let you know if your video is already in the correct format. If it’s not, your video will slowly be converted to an H.264 video.

UPDATE: I’ve heard several complaints of iTunes creating iPod videos without sound. You should probably avoid using iTunes to convert your videos.

In QuickTime Pro, open your movie and, in the file menu, select Export… and in the export drop-down, select Movie to iPod (320 x 240) and click Save. QuickTime will create an optimized H.264 video with AAC audio.

You may want to go pour yourself a cup of tea or take a nap. If your file is large, QuickTime’s slow conversion process can take several hours.

If you’re an inexperienced user, I recommend using QuickTime Pro or iTunes because they’re absolutely foolproof. However there are other much faster, more powerful applications for converting your videos. Read on!

Don’t have QuickTime Pro? Aiseesoft iPod Video Converter!
Aiseesoft iPod Video Converter supports so comprehensive video formats including converting MPG, MPEG, MPEG2, VOB, MP4, M4V, RM, RMVB, WMV, ASF, MKV, TS, MPV, AVI, 3GP,3G2, FLV, MPV, MOD, TOD to iPod Video MP4, iPod Video H 264. You can customize your own output video by the settings function. For example, if you want a high quality video you can raise the values of Video Biterate, Audio Biterate and Audio Sample Rate, if you want a smaller file you can reduce the value.

Settings

If you want to make your DVD compatible with your iPod and even transfer your iPod video to Computer, you can choose Aiseesoft DVD to iPod Suite which is an all-in-one solution to convert DVD to iPod Video MP4, iPod Video H 264 and convert video to iPod Video MP4, iPod Video H 264. Moreover, it can transfer video from iPod to computer. You don’t need to worry about losing anything.
For Mac user, you can choose Aiseesoft iPod Video Converter for Mac and Aiseesoft DVD to iPod Suite for Mac.

2010年10月26日星期二

How to backup DVD movies to DVD for free

This is a tutorial that explains the process of backing up a DVD on a PC using DVD Shrink. While there are many software solutions for backing up DVDs, the one on Windows I like is DVD Shrink. On Mac OS X, I like this DVD Copy for Mac.

that can copy DVD movie (D9 to D9, D5 to D5) with the entire movie in 1:1 ratio perfectly. This tutorial will be a concise explanation of how to backup DVD movie to DVD for free. There are many reasons to make a backup copy of DVDs one has purchased, keep reading to learn how to improve the quality of your re-encoded backups.

Step 1, download DVD Shrink
You can download DVD Shrink from: http://www.DVDshrink.org/.
For Mac users, you can download the DVD copy for Mac from here.

Step 2, Run DVD Shrink and insert your DVD movie into the DVD drive
The first thing you will need to do is open the disc. Click on "Open Disk" at the top-left of the program window. A small window will pop up. There is a drop down menu - select the drive and disk that you are going to backup. Then click OK. When you click OK, the DVD will be “analyzed”–this process will last for 1-3 minutes, then DVD Shrink will “suggest” a level of compression.

back up DVD - insert DVD movie

If you receive an error while trying to rip the DVD (like the one shown in the screenshot above), you will need to use another program such as DVD Decrypter to copy the DVD files off of the disc on to your hard drive. You need to minus the copy protections first. Click here to read how to use DVD decypher to minus the copy protections of DVD.

DVD decypher

Step 3. Adjust compression for individual Titles (optional).
DVD Shrink will automatically select the highest possible quality settings that will fit on your disc. You could accept the settings that DVD Shrink chooses. You can also increase the quality of the main movie file by reducing or eliminating other video and audio files on the DVD.
Many modern DVDs will contain bonus footage, trailers, multiple surround sound modes, and other settings that one can reduce or eliminate to improve the quality of the main movie feature.
The main movie quality setting is reported to the left of a slider bar in the top right of the screen. In the screenshot below we see that the default setting requires that the main movie be compressed to 48.2% of its original level to fit on the disc. You can increase this percentage to improve the final quality of the backed-up DVD. But the output file will be larger.

backup DVD Movie - setting

The way in which one goes about improving the quality of the main movie will be different depending on your specific needs. For example, when “Dolby Digital” and “DTS” 5.1 audio tracks are available, you can remove “DTS” (to save hundreds of megabytes), you can also choose to preserve “DTS” and reduce or eliminate other items from the DVD.
Some of the settings I made to this particular DVD were:
--Removed “5.1-ch French” audio track (went from 48.2% to 55.4% compression for main movie).
--Replaced certain Titles with “Still Image” (keep reading for more on this).
To improve the quality of the main movie, you'll need to reduce or eliminate other DVD features, each called a “Title” in DVD Shrink. Click the “plus sign” next to “Extras” in the menu to view the other titles.

DVD Shrink

The Title I've selected below was 72MB. In this case the video was a “behind the scenes” feature that I did not wish to keep. Since one cannot completely remove any of the “Titles,” the next best thing is to replace them with a still image. In order to do this, select the title you want to replace, and choose “Still Image” from the drop-down menu in the top right. In this case the file went from 72MB to 66MB. The still image is configurable, simply drop an image of your own into the aptly named Still Images directory found under Program Files > DVD Shrink.

Step 4, Burn the re-encoded files to disc.

burn file

Click “Backup DVD” and Now select the folder where your temporary files will be saved. DVD Shrink needs to save a bunch of files on your computer (that actually compose your movie) so that it can burn that movie back onto another DVD. This is why you had to clear 5 gigs of space on your hard drive. Once the DVD backup has been burned, you can go ahead and delete these temporary files (the program does not do this itself).
You may as well select “Region Free” (default) under the DVD Region tab.
on the Burn Settings tab make sure “Maximum” burn speed is selected in the drop-down menu.
Once you have the settings the way you like them, begin the burn process. You'll see the “Encoding” happening first. There is a video preview that will show you where you are, but I believe that the encoding process goes slower with this setting enabled.

burn DVD movie - Encoding

Once the files have been copied to your hard drive, your original DVD movie will eject from your computer.
You will also have a pop up asking you to put a blank DVD into the DVD burning drive of your computer that you previously selected.
Exchange the original DVD movie for a blank, burnable DVD. Push the blank DVD into the drive. DVD Shrink will begin burning the new DVD automatically in a few seconds. Now you will get a pop up that shows the progress while the program burns your new DVD movie. Once the new DVD has been burned, you will get a window that tells you that it's done. Click OK, close the program, and take your new DVD movie backup. All Done!

Note: DVD Shrink is only for PC users. If you are a Mac user, Please download DVD copy for Mac .

2010年10月24日星期日

MySpace, Apps Leak User Data

MySpace and some popular applications on the social-networking site have been transmitting information to outside advertising companies that could be used to identify users, a Wall Street Journal investigation has found.

The data were primarily sent by MySpace when users clicked on ads on the website. MySpace had pledged to discontinue the practice of sending personal data when users click on ads after the Journal reported it in May.

A MySpace spokesman said the data identify the user profile being viewed but not necessarily the person who clicked on the ad. MySpace is owned by News Corp., which also owns The Wall Street Journal.

MySpace, which had 58 million visitors in the U.S. in September, has been struggling to turn its business around in the face of tough competition from Facebook Inc., which had 148 million U.S. visitors last month, according to comScore Inc.

Read the rest of this post on the original site

2010年10月22日星期五

Hulu Plus, Take Two: How’s $4.95 a Month?

Hulu is considering cutting the price of Hulu Plus, the subscription service it began testing in June, sources tell me. I’m told the video site is talking about slashing its $9.95 per-month fee in half, to $4.95.

Hulu Plus was supposed to be the video site’s strategy to generate a second revenue stream to complement the free, ad-supported site that launched in 2008.

The idea is that paying subscribers get access to a deeper catalog of TV shows and movies than what the free service offers, as well as the ability to watch Hulu on devices like Apple’s iPhone and iPad, Microsoft’s Xbox 360 game machine and Internet-connected TVs from Samsung and Sony.

But a price cut would indicate that consumers haven’t bought in to the pitch. That shouldn’t be a shock, considering the other video options that consumers have, and the limits that Hulu’s content providers have placed on the service.

At $8.99 a month, for instance, Netflix subscribers get access to a very deep catalog of movies and TV shows delivered on DVD, and a growing number of titles delivered to their PCs, phones or iPads.

But Hulu Plus is limited primarily to current broadcast shows from its three owners–Disney’s ABC, GE’s NBC and News Corp.’s Fox–as well as other shows that have stopped running on TV. (News Corp. also owns Dow Jones, which owns this site.)

And tensions between programmers and cable providers mean that Hulu won’t give subscribers access to current cable shows from those same partners–even though some of them are (barely) available on conventional Hulu. “It’s a broadcast-focused service,” in the words of CEO Jason Kilar.

Hulu declined to comment about the service, which is still officially in beta mode.

2010年10月20日星期三

Consumer Reports Can’t Recommend iPhone, Can Recommend Consumer Reports Shopping App

Consumer Reports’ odd love/kinda-love relationship with the iPhone continues. The buying guide continues to give Apple’s iPhone 4 “stellar” marks, but won’t actually recommend it, because of antennagate.

But if you do go ahead and buy the new handset, or any other iPhone model, Consumer Reports supports your decision! Because it would like to sell you its new iPhone app for $9.99.

The Consumer Reports Mobile Shopper offers what several shopping apps do–the ability to scan a bar code and get information about a particular product, as well as the ability to browse through the shopping guide’s ratings for other data.

Other apps, including Best Buy’s Tecca, are free, so Consumer Reports is betting that access to its data is worth the premium. But that seems to work for it online, where it has some three million subscribers.

If you’re on the fence, consider jumping in sooner rather than later: The app’s price will jump to $14.99 on January 1. A version for Google’s Android is in the works.

2010年10月18日星期一

How to put DVD movie into Windows Movie Maker and iMovie

If you want to edit a DVD movie with Windows Movie Maker or import several DVD clips into Mac iMovie to build a new DVD, but you get frustrated with the DVD format, this guide may help you solve the problem.

Before you get started, it will be helpful if you learn something about the DVD, WMM and iMovie.
General DVDs have CSS copy protection in MPEG-2 or VOB format.
(Windows) Windows Movie Maker supports WMV, AVI and MPG video files.
(Mac) iMovie accepts MOV and MPEG4 video files.

This guide includes two parts:
1. How to put DVD movie into Windows Movie Maker.
2. How to add DVD clips to Apple Mac iMovie .

Part1. How to put DVD movie into Windows Movie Maker

Step1. To put a DVD movie into Windows Movie Maker, you have to rip your DVD to WMV or AVI video first, and then you can load it into Windows Movie Maker. I’d prefer using Aiseesoft DVD Ripper to do this. You can get this program at: http://www.aiseesoft.com/dvd-ripper.html Then install and run it, put your DVD disc into your DVD drive, click “Load DVD” to locate your DVD file and import it, or load it by clicking “Load IFO File” to add DVD IFO file. (This DVD Ripper can rip copyright protected DVD movies, but you should remember that it’s illegal rip DVD for any business purposes)

Rip DVD with DVD Ripper for WMV

Step2. Select output format and subtitle

After you load the DVD files, click the format drop-down list to select “WMV – Windows Media Video (*.wmv)” or “AVI – Audio Video Interleaved (*.avi)” as the output format. A regular DVD movie has multiple subtitles and audio tracks, and you can select the right one for you. If you just want a certain part of the DVD movie, you can click “trim” to cut the DVD movie. Just drag the timeline bar to set the start and end time, and then blue line will be the captured parts.

Rip DVD into Windows Movie Maker

For advanced user, if you want to output higher quality video, click the “Settings” button to open the panel, here you can customize video bitrate, audio bitrate, resolution, framerate, etc. Higher bitrate will result in bigger file size.

Step 3. Start to convert

After the above steps, you just need to click “Start” and wait for the conversion to be finished. It provides the fastest conversion speed (>300%), completely support dual core CPU.

Step 4. Edit DVD with Windows Movie Maker (optional)

Run Windows Movie Maker, in the “Movie Task” bar, click “Add Video” to browse your computer and located the converted files, and then you can start to make personal movies.

Edit DVD with Windows Movie Maker

Tips:Many users may wonder how they can convert Windows Movie Maker file (*.MSWMM) to other video format. Actually, A *.MSWMM file is not a video file. It is a project file of Movie Maker (more like a record file). You have to open this file in Windows Movie Maker and save the movie to your computer: Go to Movie Tasks bar > Finish Movie > Save to my computer. After that you will have a WMV file which can be converted to another video format or burned to DVD.

Part2. How to add DVD clips into Apple iMovie.

iMovie is similar to Windows Movie Maker, it supports MOV and MP4 video, so you just need to convert your DVD movie to the right format. Aiseesoft DVD Ripper has a Mac Version which supports both Mac OS Tiger and Leopard; you can download it for free from here: http://www.aiseesoft.com/dvd-ripper-for-mac.html
It is easy to use for the operation steps being similar to the windows version.

put DVD into Apple iMovie

When the conversion is finished, you can run the iMovie, build a new project, and then drag the converted files to the work space to make personal files.
When the task is finished, In the Menu bar, Click "File" -> "Export" and save it as QuickTime video.

put DVD into Apple iMovie

Download Aiseesoft DVD Ripper for Windows (put DVD into Windows Movie Maker)
Download Aiseesoft DVD Ripper for Mac (put DVD into Apple iMovie)

2010年10月17日星期日

How to Put Photos on a PSP

What you need?
1. A PSP
2. A computer
3. A PSP to computer cord
4. Photos you want on your PSP

Step1, On your computer you will need to find the pictures that you want on your PSP.
Step2, You will need to create a folder on your desktop called PHOTO all in capital letters. Then, drag and drop the picture(s) you want on your PSP into this folder.
Step3, You will need to plug your PSP into the computer using the PSP to computer cord. Then, on your PSP go under the settings menu, and select the option that says USB connection. You should now be in USB mode on your PSP. .Now that your PSP is in USB mode, the computer should recognize it and open an options menu.
Step4, Your computer is displaying an options menu, select the option that says open folder to view files. Now, your computer should be displaying the folders on your PSP.
Step5, Open the folder that says PSP. Now, your computer should be displaying the folders inside of the folder named PSP.
Step6, Drag and drop the folder named PHOTO - the one with your picture(s) -into the folder named PSP, the one you are viewing. You're done; you've found out how to put pictures on your PSP. Now, go show your picture(s) off to friends, family, and whom ever you want.

Recommended Products For you:
DVD to PSP Converter for Windows
Aiseesoft DVD to PSP Converter for Windows is a professional application that is designed to convert DVD movie to PSP on PC.
PSP Movie Converter for Windows
Aiseesoft PSP Movie Converter is a professional video to PSP converter for Windows that can convert all sorts of video formats to PSP video on PC.

2010年10月16日星期六

Where to download free iPod Videos

Free iPod Videos, Legal nano Videos, Places to get iPod, iPod nano Videos
1. The Internet Archive is great for old videos and movies. The Archive’s 256Kb MPEG4 Downloads are unfortunately not iPod-ready as previously thought. The format’s correct, but there are audio pops when played back on the iPod. You’re probably better off downloading the MPEG2 videos anyway. The 265Kb files were pretty low-res and it’s a snap to re-encode the MPEG2 files for your iPod with Aiseesoft Video Converter for Mac.
2. The Chronic..What?..cles of Narnia.
3. The iTunes Music Store’s podcast section is loaded with free videos.
4. Channel 101 and Channel 102 offer up some brilliant downloadable videos.
5. PodGuide.tv
6. Channel Frederator offers up some of the best short animations anywhere.

Illegal Places to Get iPod Videos
You’re probably familiar with most of these options, but if you aren’t then they’re new to you!
1. Search the BitTorrent network for iPod.
2. Check Podtropolis
3. The Pirate Bay!
4. Seriously, you should probably stick to LEGAL sources for iPod videos.

Downloading Free Music Without Fear
3hive.com: A great blog-style listing of free iPod-compatible songs offered by record artists and labels in an attempt to entice full-album purchases. Songs are in the MP3 format in a variety of bit-rates generally ranging between 128kbps and 192kbps.

Download Free music

Epitonic.com: Offers highly professional, artist-focused presentation of free digital music downloads in MP3 format, with biographical details and short previews for songs across a narrow collection of genres.

Download Music

Freekidsmusic.com
: Along with its sister site Freechildrensmusic.com, provides a large variety of free MP3 format songs for young listeners.

Download MP3 Music

Garageband.com: Not to be confused with Apple’s music creation application of the same name, Garageband.com collects and provides popularity charts of independent music, featuring over 125,000 bands.

Freekidsmusic - Download music

MFiles.co.uk: Provides free downloads of well-known classical music in MP3 format.

MFiles.co.uk - Download classic music

MP34U.com: A clean, professionally designed interface to individual free songs sorted by genre, selected by site “sources” who pick and post only music they like.

MP34U.com - Download music

Music.download.com: The music-dedicated expansion of popular software download site Download.com offers free full-length MP3 songs across all major genres, even including Children’s, Spoken Word, Comedy, Folk and Religious tracks. Most tracks are indie.

PureVolume: Offers over 100,000 free songs for download, and captured many of the best users of what used to be MP3.com (before it was scrapped, sold, and completely changed).

PureVolume - Download music

RCRDLBL: An exclusively-online record label which provides free MP3 downloads of exclusive music from emerging artists.
Of course, if you can’t find the song you’re looking for on one of these free sites, you can always visit Apple’s iTunes Store or Amazon’s MP3 Store and make a purchase there. Though these aren’t as cheap as some of the questionable international sites listed in the prior section, they are an entirely safe and legal way to get access to over a million songs.

Free Music with a Catch: Ad-supported Sites
Years ago, the most common source of free music for your listening enjoyment was the radio. Radio stations were able to broadcast music from a wide range of artists at no cost to the listener. Instead they made money through advertising services. The “price” a listener paid to listen to free music in those days was having to endure listening to advertising interspersed with the music.
Recently, some web sites have begun to offer a similar business model: You can download free music, but this is either done through a client or web site with very proactive advertising (as opposed to the standard advertising on most web sites), or the music tracks themselves contain brief advertising spots placed at the beginning of each track.
Unfortunately, most of the sites that offer these types of services, such as SpiralFrog and Ruckus Networks (for U.S. college students) only offer their downloads in a Windows Media Audio DRM-protected format that is incompatible with iTunes or the iPod (or ironically, even the Microsoft Zune). Further, these tracks may not be burned to a CD. These sites are therefore generally of no value to iPod owners.
A notable exception is We7, a UK-based ad-supported site whose founders include Peter Gabriel. We7 provides downloads in a DRM-free 192kbps MP3 format, with the catch being that each track has a 6-12 second advertisement grafted onto the front-end. Ad-free tracks may be purchased outright, and We7 also offers a credit system whereby you can convert some of your tracks to ad-free versions once they have been in your library for 28 days or more. Since these tracks are in an open MP3 format, they can be played on just about any digital media player available.

We7 - Download iPod Video

Although primarily a paid subscription music service, eMusic.com provides a free ad-supported music service as well. In this case, the advertising is directed at the user via the ALOT toolbar which is installed in your web browser (compatible with IE6, IE7 and FireFox 2 only).

Downloading Free Podcasts: Radio for your iPod, iPod nano.
In addition to free music for your iPod, you can also download “Podcasts,” short radio-style programs produced by individuals and companies around the world. Many of these podcasts include music selections, and some are even dedicate to showcasing independent artists and providing music commentary and review.
While podcasts were originally organized in several independent podcast directories out on the Internet, the ITunes Store now includes an extensive catalog of podcasts which you can subscribe to directly via iTunes completely for free. Podcasts available through iTunes include both audio and video podcasts, and cover an extensive range of topics. Basically, anybody who has anything to say on a regular basis can create their own podcast and get “on the air” via iTunes quite easily.
A selection of music-specific podcasts can be found right in iTunes in the Music Podcasts Directory, which includes a comprehensive selection of music-related podcasts from music reviewers, traditional radio stations, and even directly from both small independent and more mainstream artists. So it helps you download your favorite iPod Videos

Music Podcasts Directory -Download iPod Video

2010年10月11日星期一

Body Organs Can Send Status Updates to Your Cellphone

For cardiac patients such as myself, too much excitement can be a shocking experience. If my heart rate gets too high the implanted defibrillator in my chest can think I’m having a heart attack and give me a friendly remedial shock.

Read the rest of this post on the original site

2010年10月10日星期日

Ex-Skype CEO Joins Greylock as Executive in Residence

Entrepreneur and veteran tech exec Josh Silverman is now lending his perspective to the VCs at Greylock Partners as an executive in residence. Among the bullet points on Silverman’s résumé: Co-founder and CEO of Evite, CEO of Shopping.com, builder of eBay’s European classifieds business and CEO of Skype.

2010年10月8日星期五

When People Are Willing to Pay For “Almost Nothing”: The Economic and Emotional Logic of Web Paywalls

Marco Arment is the developer behind Instapaper, the devilishly useful time-shifting tool for reading. Just as a DVR allows you to watch Mad Men when it’s convenient for you — say, at 6:45 p.m. Thursday instead of 10 p.m. Eastern on Sunday — Instapaper lets you read long-form prose when you’ve got the time and attention to devote to it.

Read the rest of this post on the original site

2010年10月6日星期三

How to sync and put cusomized ringtone on iPhone

Previous part: How to convert DVD, Movie, Music to iPhone ringtone and put ringtone on iPhone/iPhone 3G?

There are also some other ways to convert audio to iPhone ringtone and sync it to iPhone with iTunes, but I think these are a little complicated and users may be at a loss with such ways.

Here I recommend iPhone PC Suite, an almighty iPhone manager that can let you manage phone book, software, media and other files between iPhone and computer without iTunes easily.

But before using this tool, make sure your iTunes installed and has been connected with iPhone once before (Then you will never need not run iTunes when you use iPhone PC Suite to manage your iPhone).And when the first time you connecting iPhone, it will install PhoneDaemon on your iPhone, don’t worry it is green software and will do nothing harm.

Now I will show you how to sync the converted iPhone ringtone to iPhone without iTunes. Connect you iPhone to computer, double click” iPhone PC Suite” to start iPhone PC Suite, the program will scan you iPhone automatically for a short while. Then click button “Personal” on the main menu, select ”ringtone”.

put ringtong on iPhone

Click “New Ringtone” to locate the converted iPhone ringtone.put ringtong on iPhone

Select your target iPhone ringtone, then it will upload the ringtone to iPhone automatically.

put ringtong on iPhone - ringtong loading

Then you can select your favorite audio file and set it as your iPhone ringtone on iPhone. Click “setting”->”Sound”->”Ringtone”, the converted ringtone is listed on column “Customize”. Now you can enjoy the fun of your unique iPhone ringtone!
This free iPhone PC Suite also has other powerful functions, we will share them later.

Previous part: How to convert DVD, Movie, Music to iPhone ringtone and put ringtone on iPhone?

2010年10月5日星期二

How to use DVD decypher to rip DVD to iPod, PSP, PowerPoint etc on PC

1. Use DVD decypher to rip DVD to VOB files.
DVD Decrypter is a free DVD ripper that can create backup disc images of the DVD-Video structure of DVDs. It can be used to image any DVD, but controversially it is especially useful for decrypting copy-protected movies. The program can also burn images to disc. CSS decrypting software (such as DVD Decrypter, AnyDVD, Smartripper, and DVD Shrink) allows a region-specific DVD to be copied as an all-region DVD. It also removes Macrovision, Content Scrambling System (CSS), region codes, and user operation prohibition.
Step 1. Install DVD decypher
Download it from: http://www.dvddecrypter.org.uk/. To install DVD decypher, simply mount the .exe archive by double-clicking it, and setp by step to click "next".
Step 2. Rip DVD using DVD decypher
After you insert a movie DVD into your DVD burner or player, launch DVD Decrypter. In the window to the right you will see all the files on that DVD.DVD decypher

NOTE: If the files are not shown in the right window pane, on the Task Bar, click on Mode and click on FILE F to place a checkmark beside it as shown in the picture above.
You can choose the output folder by:
Under "Destination", click on the Folder out to the right of the movie path, locate the folder you want to rip the DVD to, then double left click on folder to open it then click OK.

DVD Decrypter

You can select to rip the whole DVD or choose to rip a segment of the DVD.
Explanation:
.IFO = The IFO files includes information such as chapters, subtitle tracks and audio tracks.
.VOB = The VOB files contains the actual video, audio, subtitles and menus.
.BUP = Backup files of the IFO files.

DVD Decrypter - file explanation

Step 3. Finish conversion
Click on the Hard Drive Symbol to the right of the green arrow. After clicking on the Hard Drive Symbol, you will have the screen which shows the decryption in progress.
After conversion by this free DVD ripper, you can find the VOB files in the "Destination".

2. Convert the .VOB files to video formats compatible with iPod, iPhone, PSP, PowerPoint, etc.
Now you need to use Aiseesoft Total Video Converter to convert .VOB files to formats compatible with popular players such as iPod, iPhone, Apple TV, PSP, etc. You can also upload the converted files form DVD (.VOB) to YouTube, Myspace, and other video sharing site. YouTube accepts a wide range of video file formats such as .WMV, .AVI, .MOV, and .MPG, etc. PowerPoint understands mpeg, asf, avi, wpl. wm, wmx, wmd, wmz, dvr-ms, mpv2, mp2v, mov, etc. If you want to put the VOB files on PowerPoint, you can choose .avi as output format.
Step 1. Download and install Aiseesoft Total Video Converter.
Step 2. Run Aiseesoft Total Video Converter, click "Load DVD" button to import the .VOB files, choose the output format, then click "Start" to start the conversion, the default setting works perfectly.

Total Video Converter

Step 3. After conversion finished, you can use transfer the converted files to the players.
For example :
use iTunes to transfer the mp4 video to your iPod, here are the steps:
1). Open iTunes and click "File" to add your converted videos to iTunes library.
2). plug in your iPod to computer, then iTunes will detect your iPod as a device.
3). Select your iPod device on the left panel of iTunes, click "Movies" tab, check the videos you want to sync and click "Apply", done.
Use Zune software to transfer wmv video to Zune player, here are the steps:
1). Install Zune software, you can download it from here for free: http://www.zune.net
2). Plug in your Zune player to computer
3). Drag the wmv video to Zune library
4). Click "start sync" to sync your Zune. OK.
Tips: Aiseesoft DVD Ripper can rip DVD to all popular video and audio formats directly. It can rip DVD to videos including MP4, AVI, M4V, 3GP, MPG, MPEG, FLV, etc; and it can convert DVD audio to MP3, M4A, AAC, AC3, etc. And it is more easy to use than Mac the ripper. You can have a try.

2010年10月4日星期一

How to make iPhone Ringtones on Mac and Windows for FREE

I have many iPhone Ringtones on my iPhone, and I change them once one day. But I don’t buy them online. I just make iPhone Ringtones myself by Ringtone Maker Shareware. Actually, iPhone Ringtone maker is m4r Ringtone Maker, such as mp3 Ringtone Converter, WMA Ringtone Converter and WAV Ringtone Converter. There are also iPhone Ringtone Converter for Mac or iPhone Ringtone Creator Mac.

Here I will share how to make iPhone ringtones on Windows and Mac.
For Windows:
Firstly, you need download iPhone Ringtone Maker.

iPhone Ringtone Maker

Step 1: Load Music
Click “Browse” on the right side of “Input File” to find your music that you want to make as your iPhone ringtone and click “Open” to load it into iPhone Ringtone shareware.
Step 2: Choose iPhone Ringtones
1. Drag your “Start Slider” to the beginning of the “Slider Bar” and “End Slider” to the end, then Listen iPhone Ringtone 
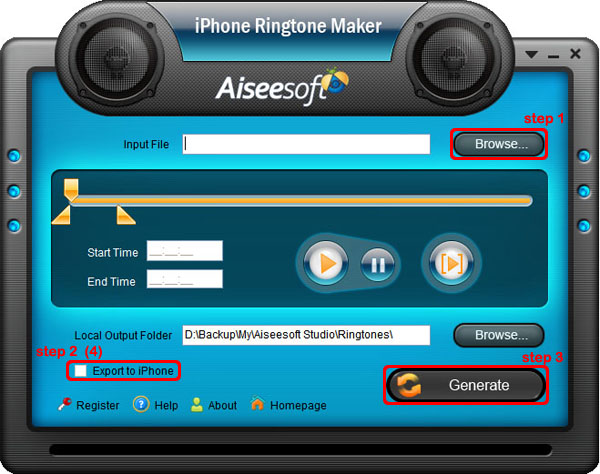
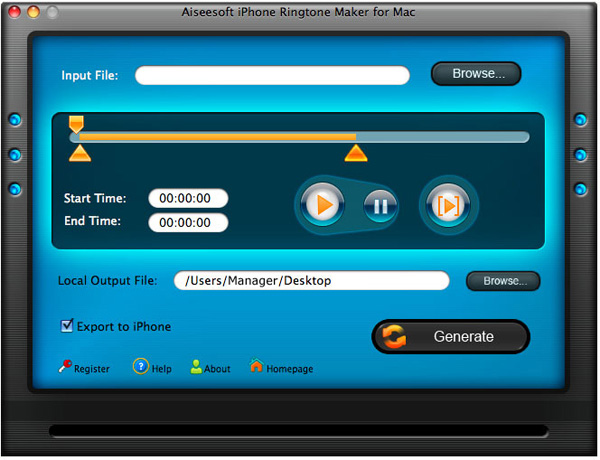
to listen your whole audio file.>br/>2. a. Drag the “Start Slider” to find where is the beginning of your ringtone and Drag “End Slider” to make an End of it.
b. Type the exact “Start Time” and “End Time” in the box to choose your ringtone.
3. ClickPre-listen iPhone Ringtoneto pre-listen your ringtone.
4. If you want to put your ringtone directly on your iPhone, just plug your iPhone to your computer and check “Export to iPhone” (4). If you just want to put it on your computer, click “Browse” on the right of “Local Output Folder” to find a place to put it.
Step 3: Generate iPhone Ringtones After you have done the 3 steps, just click “Generate” to make your iPhone ringtones.

For Mac:
If you are a Mac user, you need to find iPhone Ringtone Converter for Mac or iPhone Ringtone Maker for Mac.
Here I have one for you, just download this iPhone Ringtone Maker for Mac.

iPhone Ringtone Maker for Mac
The process of making your own iPhone ringtone on Mac is the same as on Windows.
Hope you enjoy this DIY process.